How-To Guides
Swirl Marks: What Causes Them and How to Remove Them
Swirl marks are thousands of tiny scratches catching light. Here's exactly what puts them there, how to stop adding more, and what removal really involves.
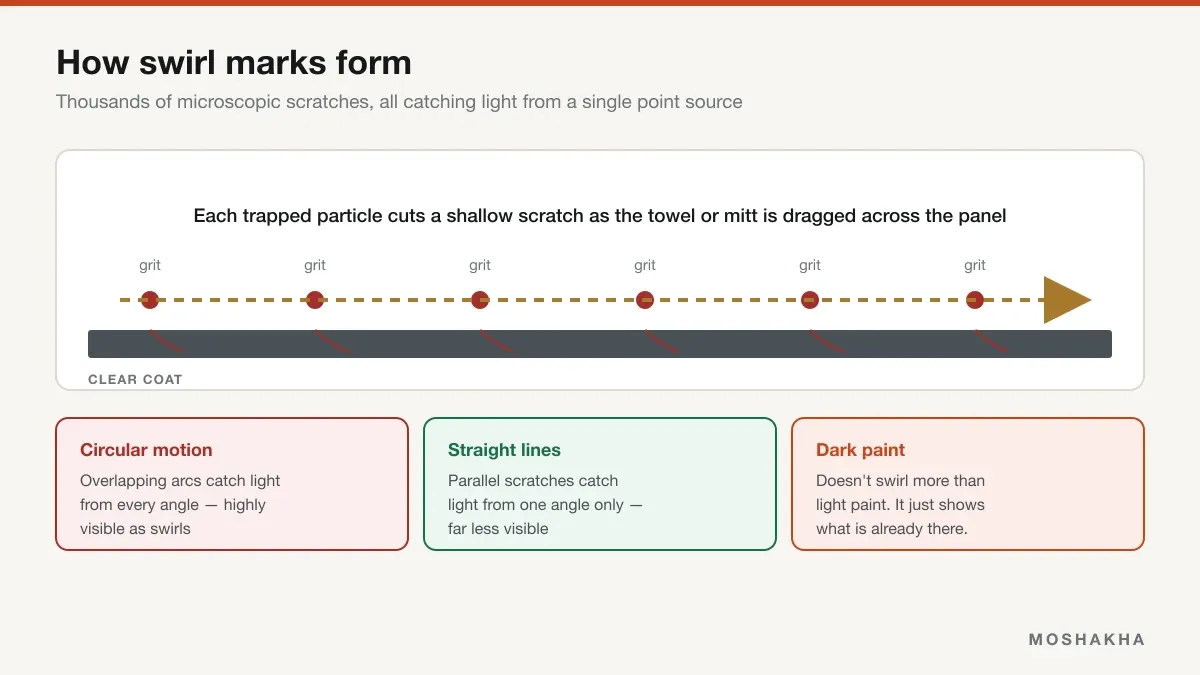
Swirl marks are the most common paint defect on a daily-driven car, and they are almost entirely self-inflicted — usually by the washing that was meant to look after it.
What they actually are
Not one defect. Thousands of microscopic scratches in the clear coat, all roughly the same shallow depth, scattered across the panel.
A scratch scatters light instead of reflecting it cleanly. Under diffuse light — an overcast day, a garage — you won’t see them. Under a point source, like direct sun or a service-station forecourt light, each scratch throws light back at a different angle and the whole population lights up at once as a halo around the light source.
That halo is what people call swirl marks. It looks circular because the scratches were made in circles.
Where they come from
In rough order of how much damage they do:
Automatic car washes with brushes. The single worst thing you can do to paint. Those brushes have been dragged over hundreds of filthy vehicles and are loaded with embedded grit. Touchless washes are fine; anything with spinning bristles is not.
Washing with a sponge. A flat face traps grit between the sponge and the paint with nowhere else to put it. This is structural, not a technique problem — the comparison is here.
One bucket. Every dunk contaminates your soap. By the fourth panel you’re washing with gritty water.
Wiping a dry car. Removing dust with a dry cloth, or using a “quick detailer” on a genuinely dusty panel, drags every particle across the paint with no lubrication at all. This does an extraordinary amount of damage for how harmless it feels.
Drying badly. A dropped towel, a towel washed with fabric softener, or a saturated towel being rubbed rather than pulled. Drying is the second-highest-risk step after washing.
Circular motion. Doesn’t create more scratches — makes the ones you create far more visible.
Stopping the damage
The habits, in order of impact:
- Never use a brush-type automatic wash. Nothing else on this list matters if you do this monthly.
- Two buckets with grit guards. Full method here.
- A mitt, not a sponge.
- Top to bottom, straight lines, no pressure.
- Never touch a dry, dusty car. Rinse first, always. If you cannot rinse, leave it dusty — dust does far less harm sitting there than being wiped off.
- Dry immediately with a clean, high-GSM towel, laid flat and pulled.
Removing the ones you already have
Two honest options, and a lot of marketing that blurs them.
Filling (temporary)
Glazes, cleaner waxes and “scratch remover” products contain fillers that sit in the scratches and reduce how much they scatter light. The car looks corrected. It isn’t — the fillers wash out over a few weeks and the swirls return unchanged.
This is a legitimate choice if you know what you’re buying. It’s cheap, safe, and takes an afternoon. It is not correction.
Machine polishing (permanent)
Polishing removes a thin layer of clear coat, levelling the surface down to the base of the scratches. The scratches are genuinely gone.
The cost is that clear coat is finite. A typical factory clear coat is very thin, and each correction removes some of it. A car can only be properly corrected a handful of times in its life before the coat becomes too thin to protect the paint underneath.
If you’re doing it yourself:
- Use a dual-action polisher, not a rotary. A DA’s oscillating motion resists building enough heat to burn through. A rotary can strike through clear coat in seconds in inexperienced hands.
- Start with the least aggressive combination — finishing pad, finishing polish — and step up only if that isn’t enough. You cannot put clear coat back.
- Test on a lower panel, not the bonnet.
- The paint must be perfectly clean and decontaminated first. Polishing a panel with grit still on it grinds that grit in under power.
If the car is a lease, or you’re unsure, a professional correction is money well spent — partly for the result, mostly because they’ll measure the paint depth first.
The part people skip
Correcting paint and then washing it the same way as before just resets a clock. The swirls come back, and you’ve spent some of a finite resource to get there.
Fix the method first. Then correct, if you still want to.
Frequently asked questions
What causes swirl marks?
Grit dragged across paint under pressure. Every trapped particle cuts a shallow scratch in the clear coat. The usual sources are washing with a sponge, using one bucket, drying with a contaminated towel, automatic car washes with brushes, and wiping dust off a dry car.
Why does my black car show swirls when my old white car didn't?
Dark paint does not swirl more — it shows what is already there. Scratches scatter light, and that scattering is visible against a dark background and almost invisible against a light one. A white car with identical damage simply hides it.
Can swirl marks be removed permanently?
Yes, by machine polishing, which removes a thin layer of clear coat to level the surface down to the base of the scratches. It is genuinely permanent for those scratches, but clear coat is finite — a car can only be corrected a limited number of times before the coat becomes too thin.
Do wax and glaze remove swirl marks?
No. They fill and mask them temporarily, which looks like removal for a few weeks until the filler washes out. This is not dishonest as long as you know that is what you are buying — it is a cosmetic fix, not a correction.
Is a machine polisher safe for a beginner?
A dual-action polisher is broadly beginner-safe because its oscillating motion resists generating enough heat to burn through paint. A rotary polisher is not — it can strike through clear coat quickly. Start with a dual action, the least aggressive pad and compound, and practise on a lower panel.
How do I stop getting new swirls after correcting the paint?
The habits, not the products: two buckets with grit guards, a mitt rather than a sponge, wash top to bottom, straight lines only, dry immediately with a clean high-GSM towel, and never touch a dry dusty car. Correction without changing method just resets a clock.